

Container
This article describes the Container component, its purpose and properties.
The purpose of the Container is to group several objects into one object. While grouping components will allow them to move across the main canvas as a single unit, the Container component is a more versatile way to group components and can act as a 'mini-canvas'.
This guide will not describe the dynamic visibility properties of the container, as these are generic to each component; a separate guide and tutorial on dynamic visibility can be found here.
A container is represented on the canvas by a dashed rectangle:

Adding objects to a container
Within the Component Tree
Click on the object that you want to add to the Container and drag the mouse cursor until it is positioned over the container object. When a blue bounding box appears around the container object, release the mouse button, and the object will be added to the container object:

When dragging an object into a Container that already contains other objects, the blue bounding box will appear around the container object, but a black line also appears below or above the objects already in the container. This indicates where the object will be placed in the layer stack of the container object:

On the Canvas
To add an object to a Container on the canvas, select the object with the mouse, hold down the CTRL button (CMD+⌘ Mac), and move the object until it is positioned over the container. The container outline will change to a solid blue border, release the mouse button and the CTRL button:

Selecting a container or objects inside a container
Within the Component Tree
Simply click on the Container or its contents to select either.
On the Canvas
Single-click the Container to select it:

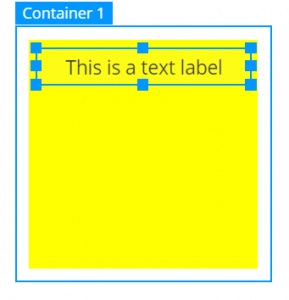
Double-click anywhere on the Container; the handles of the selection disappear from the container and a name tab appears at the top. Now single-click any of the objects inside of the container to select.
Double-click outside of the Container (or on an empty area of the container) to deselect items inside of the container or the container itself.
Resizing a Container
Set a container’s position, either in the properties panel or by selecting it on the canvas, and adjust its size by grabbing and moving the selection handles.
The container’s size can also be set by binding it to position values contained in the spreadsheet.
If the size of the container is reduced, objects within that container will not change position or size. They may therefore be hidden from view, or partially hidden:

Repositioning a Container
Set a container’s position either in the properties panel or by selecting the container and dragging it with the mouse. It can also be repositioned by binding to position values contained in the spreadsheet.
Objects inside the container will move with the container.
Positioning items inside the container
In the Component Tree
When adding an object to a container by dragging and dropping it inside the component tree, the object will be placed into the container at the same position as it was on the canvas i.e. if it was at X position: 10, Y position: 10, it will be container X position 10 and container Y position 10.
If an object is dropped into a Container but is not visible, likely, its position is likely outside of the bounds of the container. Change the position of the object using the property panel so that it is positioned inside the container, or increase the size of the container until it is large enough to show the object.
On the Canvas
When dragging objects into the container on the canvas, the objects will be placed at the position where the mouse button is released.
Container Clipping
v1.19 introduced the ability to disable clipping of components when they lie outside the bounds of the container they are in. Under the View menu, select 'Container Clipping'.
'Container Clipping' is only active in Design Mode. As soon as you enter Debug or Preview mode, the container clipping will resume and items will now hide when set outside the bounds of the container.

Removing objects from a Container
Within the Component Tree
Click and drag the object, either up above the Container, or below the last item in the container, until the black line indicates that the object is outside of the container.

On the Canvas
Double-click on any part of the Container. A name label will show above the container, and its border will become a solid blue line. Click the object inside the container and hold down the CTRL button (CMD+⌘ Mac) while dragging the object outside of the container bounds. Release the CTRL button (CMD+⌘ Mac) and mouse buttons.
Deleting a Container and/or objects from a Container
Within the Component Tree
Click to select either the container or the object and press the delete key.
On the Canvas
To delete a Container, single-click to select the container. Press delete.
Deleting a Container will delete all of its contents
To delete an object inside a Container, first double-click the container, then single-click the object. Press delete.
Last updated
Was this helpful?